Easily Master Daytime Long Exposure Photography
When you normally hear about long exposure photography, the one thing that comes to mind is that the long exposure photography is mostly done at night and you would be right, too. However, what if I tell you that in most cases, long exposure photography can also take place during the daytime?
Yes, you are still able to create some stunning images during the daytime as well and the best part is that you do not have to stay out till late, either. So, if you have somewhere to be at night or in the evening, you can just go ahead and get the daytime photography started and carry on with the rest of your day
With that said, a lot of people are new to this and that is why we are going to explore the whole concept of daytime long exposure photography. After all, the main goal that we have is to help all the users who are in need of some help. It is better that we are looking into this rather than overlooking and ignoring it altogether.
Shooting daytime long exposure photography is not something that you have to be worried about. Long exposure photos look amazing, and we all know that. You have to get the camera settings right and that can be complicated but other than that, it is not a problem.
Daytime Long Exposure Photography
The Gear You Are Going to Need
Now that we are done with presenting you with a basic concept, the next logical step is to look into the gear that you are going to need to get the daytime long exposure photography. The best part is that if you are looking into daylight long exposure without a filter, that is also achievable. However, what you must understand is that having the important gear is always there because without that, you cannot really get things in order and we do not want that, in the first place.
1. A Good Tripod
I do understand that tripod is something that a lot of people are hesitant about but you must understand that if you want some good long exposure photography, having a good tripod is absolutely important. Why? Well, you cannot really expect the shutter to be open and you holding the camera because we all know that is not how things are going to work.
For the best results, be sure that you are using a tripod and a good one, something that can keep the camera with long exposure as steady as possible.
2. Neutral Density Filter
A neutral density or ND filter is something that happens to be one of the most important aspects of shooting a long exposure image. Sure, I do understand if you want to go with daylight-long exposure without a filter but it is not something that I would suggest to everyone. Why? Well, a neutral density filter acts like sunglasses for your camera lens as it manages to cut out a specific amount of light based on the setting you have. This will allow you to use slower shutter speeds in much brighter environments.
For those wondering, ND filters are available at various stops, however, having various filters is always a good thing because let’s be honest, no one really knows how strong the sun is when they are shooting until they reach the spot.
3. Getting the Camera Right
I know this is something that might not make sense to so many of the users but getting the camera right is one of the things that most people overlook. Sure, you might be unaware of this but a camera can make all the difference when you are talking about long exposure photography, and more often than not, a mediocre camera more than ruins the experience.
Therefore, getting a good camera is an absolute must, along with the right lens, too. I would highly suggest that you check my roundup of the best cameras for long exposure. The cameras I have tested are excellent in both nighttime and daytime long exposure photography, so you can be sure that they are not going to let you down in any way.
Once you have the right camera, the next step is to start the process and we are going to share some tips that will help you shoot daytime long exposure with ease.
4. Remote Shutter Release
Okay, this is something that most people are going to be polarized about but when you are looking at shooting anything that is in long exposure, you need to get your hands on a remote shutter. Now, a remote shutter can be your smartphone too, provided you have the phone connected to your camera.
However, I would highly suggest that you are actually getting a proper dedicated remote shutter release that is going to help you get the best experience right out of the door. Reason? Well, a dedicated remote shutter release will let you take the picture and most importantly, without touching the camera. What that does is that it ensures there is no shake in the picture and that will result in a clean picture once everything is ready.
How to Shoot the Perfect Daytime Exposure
The best thing to do here is be honest about the situation you are about to get in. Daytime exposure is not as easy as one might think, but after being in photography for some time, I have come to realize that the same goes for nighttime-long exposure.
Thankfully, if you are dedicated enough, you can more than get it handled without running or jumping through a lot of hoops and we are going to tell you how to do that with ease.
As far as the setup is concerned, I have already told you what gear you are going to need. A good lens and a camera along with a tripod are important. However, what exactly is the process behind shooting long exposure? That is what we are going to get through.
1. Choosing the Correct Scene
The first thing that you need to do is choose the correct scene whenever you are in the process of taking a daytime exposure picture, or whenever, for that matter. Why? Well, without proper access to all of this, you might never really get the answer that you are trying to look for, and therefore, getting rid of these things is just as important and it is infinitely better that you are getting this out of the way
With that said, you also have to understand that there are times that you might run into some really good-looking scenes but they are not really going to be good enough to work with long exposure. This is where the actual skill comes in because part of being good at shooting long exposure has to do a lot with the ability to recognize the scene you are about to photograph and being able to determine if that specific scene is good enough for you to take a picture of.
With that said, as far as scene identification is concerned, this mostly comes with experience. However, the good news is that there are some general gives that help you understand whether the scene you are looking for is something that can work with long exposure.
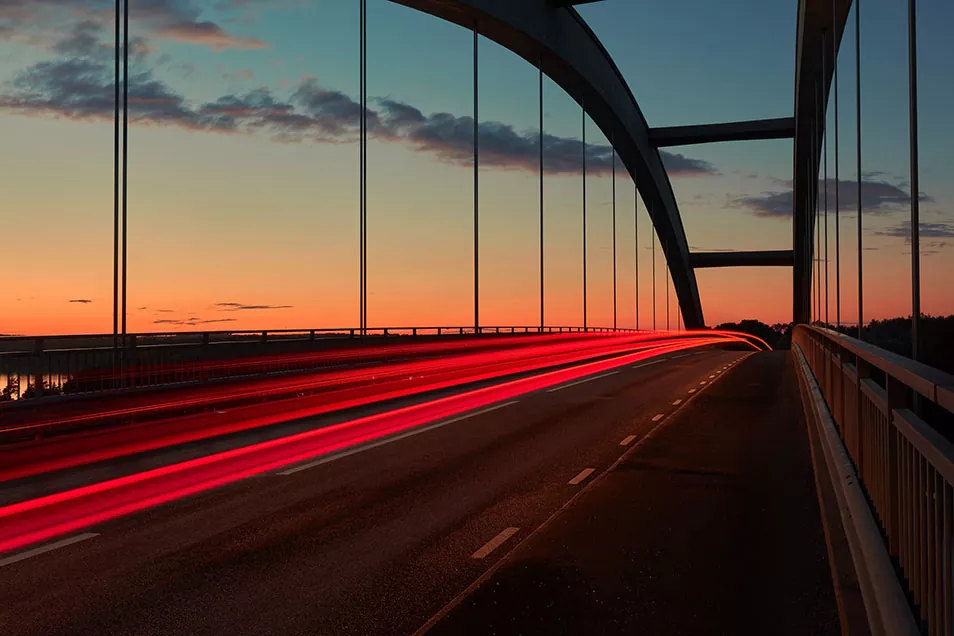
For starters, clouds, flowing water, moving cars, and a crowd moving around are some good indicators of a scene that can work well with daytime long exposure photography.
2. How to Use the Movement in Your Favour?
Obviously, the next question that most people want is just how photographers can go ahead and use something such as movement in their favor. I do understand that this can be a difficult thing to do because a lot of the times, you are not really sure what you are getting at but what if I tell you that it is not as complicated as it might seem and in most cases, you are only a few seconds away from getting the right shot.
The one tip that I would always give to you is that you should always look for a composition that is going to showcase the movement past or around something that is stationary. Why? Well, the contrast between the blurred movement and stationary object is going to be great when it comes to taking someone’s attention.
Additionally, one should also look to create some sort of path or direction of the movement because simply blurring the movement itself is not going to be something that is enough. For instance, if you are looking at a waterfall and the way it is moving, blurring the movement of the water and having the rocks be there stationary will create one of the most dramatic and attention-grabbing scenes that one can imagine.
Sure, you can actually go ahead and look for other similar scenarios, too. The point here is that one must have as much freedom as possible whenever they are in the middle of creating a shot as it is only going to make matters easier for the photographer.

The Best Settings for Daytime Long Exposure Photography
Settings obviously rule the game when you are talking about long exposure photography, both day and nighttime. However, the one thing that most photographers are always going to mess around with is the fact that they have little to no understanding of the settings that they should be going with.
The settings that you will have to use are going to depend on various factors with the overall brightness of the scene having the biggest impact. You will have to get a properly exposed image or things are going to go wrong.
This means that a daylight long exposure image that is shot sometime in the noon on a clear day will require settings that are entirely different that are shot in nighttime or evening, for that matter. The best way is to look at the settings that I have discussed below to see if you can find something worth using.
1. Nailing the Right Shutter Speed
The first thing that you have to get right is the shutter speed. I have already explained what a shutter speed is, so I am going to get right into it. If you are looking to blur the cloud movement, the shutter speed of 20 to 30 seconds is better. However, for water or other fast-moving objects, anywhere from 2 to 3 seconds is more than enough.
2. Aperture is Just as Important
You are going to need a good aperture as well. Normally, I suggest that you are going with a smaller aperture (this is where the number is larger). You are not looking to create a depth of field here and you do not want bokeh either. I would suggest that you are looking at the middle of the aperture, somewhere between f/5.6 to f/8. That should do the trick in almost all cases.
3. Low ISO is Your Friend
Now, when you are going for a low exposure shoot, the best thing that you can and should do is keep the ISO as low as possible. Why? Well, it is going to help you a lot more than you think. The lower the ISO is, the cleaner your picture is going to be. Plus, in long exposure, you do not need a higher ISO, to begin with. So, I would suggest that you are sticking to 100.
4. Using an ND Filter
The best way to get some proper use out of an ND filter is to get your shot up. This means that you should get the composition done, as well as the focus. Then you go ahead and place the filter, and adjust the shutter speed to get the right exposure. If the shutter speed is not low enough, you might need to get a better filter, but it is important to know.
Long Exposure In Daylight Without a Filter
Now, it is very important to know that without an ND filter, getting the right long exposure during the day can be almost impossible. However, if you have done this before or if you are going in with care and understanding, there are a few things that you can do going forward that will help you and I am going to mention them here.
- Use the smallest aperture possible so you can cut the light coming into your camera.
- Once that is done, keep the ISO as low as possible, because it will keep any artificial light away from the image.
- Test various shutter speeds to see which one gives you the best “long exposure” effect. This is more or less an exercise of trial and error, so chances are that it might take some time.
- If you want to get the blur effect in your pictures, you might have to go ahead and blend the images in Adobe Photoshop.
- Don’t be afraid to take multiple pictures because you might not be able to readily tell which images are going to work right away and which ones won’t.
Frequently Asked Questions
Conclusion
I do understand that most of the time, getting the right shot is very difficult, especially when you are involving long exposure but the best part is that it is not something that is going to be complicated. Sure, it is going to take some time as it is a matter of trial and error but when you are all settled, you would be in good hands.
The key here is to make matters work for you and once that is taken care of, you are going to be able to take some stunning pictures and that too, with ease.